Custom Dashboard
Use Custom Dashboards when you want to analyze custom metrics that are not available on the pre-made dashboards. Some examples of using Custom Dashboards are:
- Create dashboards centered around how your players interact with different concepts in your game. E.g: track the spending habits of your players, track most popular classes, items
- Create dashboards focused on resource management and in app purchases allowing you to see what premium currency is sourced the most and what it’s spent on.
- Create dashboards with information about Ad Activity and Ad revenue in one view.
Create a Custom Dashboard
To start the process of creating a Custom Dashboard, the first step is to go to the Dashboard list and select the Create button.

The next step is to give the Dashboard a name, and add custom widgets.

Once you select the + Widget button you will be able to create a widget with predefined or custom metrics.
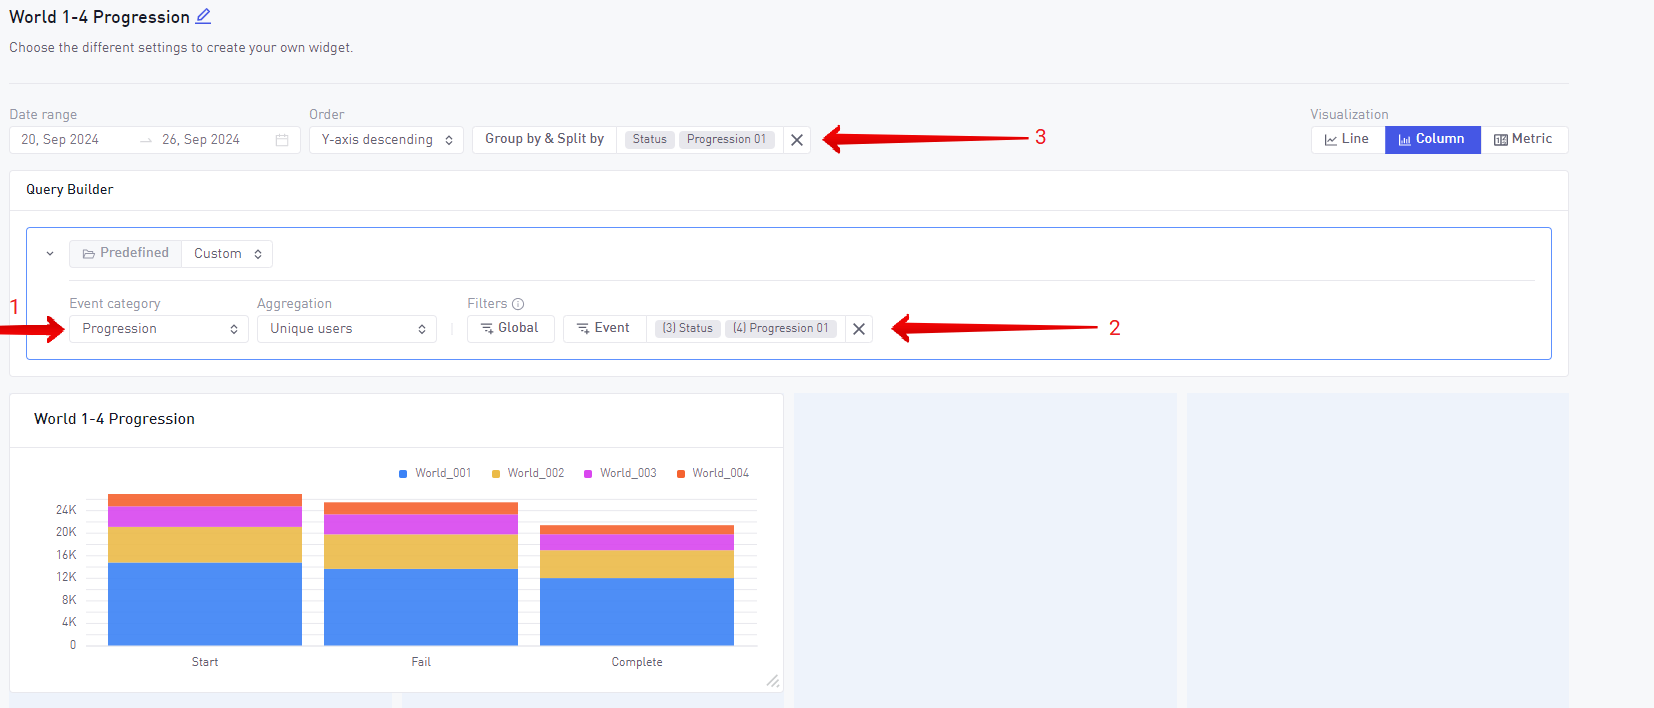
As an example, let’s create a widget that looks at how users progress through the game.
The steps required to build this widget are as follows:
- Select Event Category to be Progression Events
- Leave the aggregation to the default Unique Users
- Go to Event Filters and select the Status (exclusive to Progression Events) you want to look at (for this example we will pick all three different statuses) and the IDs you want to analyze. (for this example we will choose the first 4 Worlds)
- Finally go to Group by & Split and group by status while splitting by ID1.
- Once this is done the visualization will change to a bar chart showing the numbers of unique that have started, failed and completed the first 4 Worlds in the game.

- To save the widget select the Done button that can be found on the top right corner of the page, and to save the Dashboard select the Save button that subsequently pops up after you saved the widget.
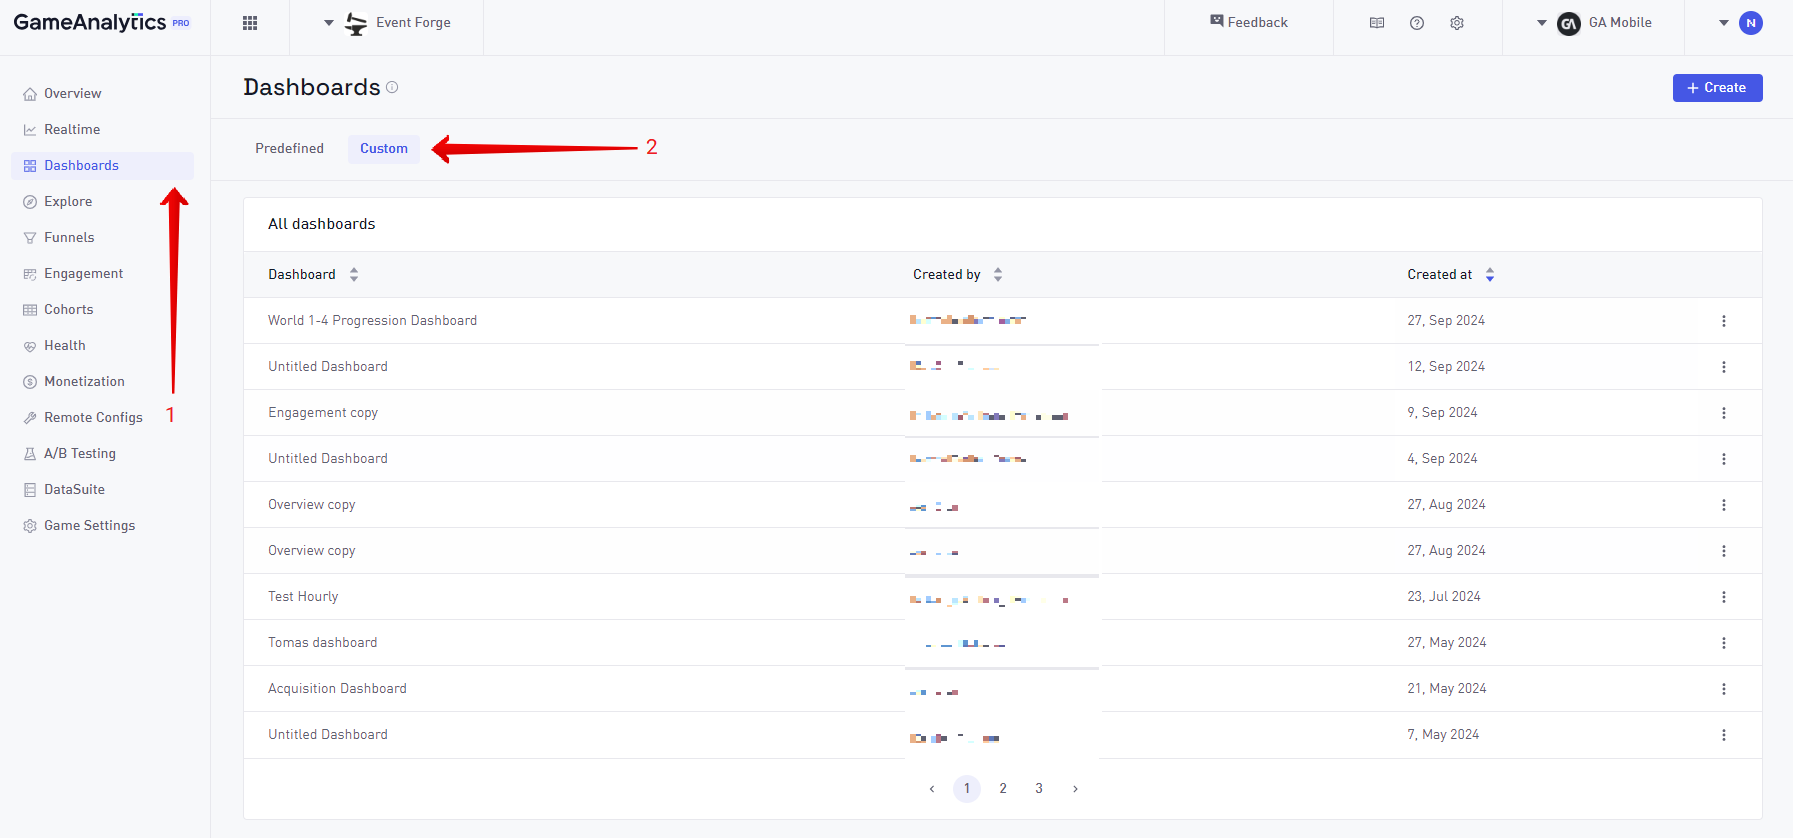
To find the custom dashboard go to the dashboard page and select the Custom button to change to Custom Dashboards view.
